
The XOLogic platform provides you with the ability to add external items to your website that do not already exist in your catalog via a bulk upload import.
Part One - FTP and Filezilla access
- Check with your account manager to ensure that you have FTP access and they can enable this feature for you. This is where your files and images will be processed and hosted for your external items.
- Once you have FTP access you will be provided with the following credentials that are similar to this.
Server: clientdemo.xologic.com
Port: 49000
User: clientdemoftp
Password: (Ask your account manager) you can change this later once it has been set up. - Once your account manager has granted you FTP access, you have the ability to view these credentials.
Login as admin and go to Settings -> Integrations -> FTP Set up. You should end up on a page like this.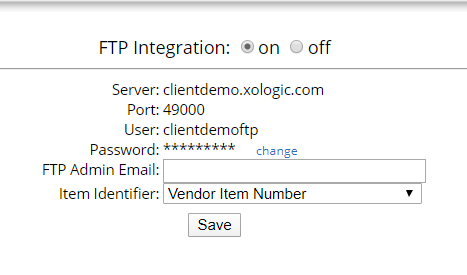
Once on this page you have the ability to change your password if you wish. - Download Filezilla to your computer. If you are using a Windows machine you need to know if you have a 32 Bit or 64 Bit processor. This link can help you determine which one you have if you do not know. https://support.microsoft.com/en-us/help/15056/windows-32-64-bit-faq
FileZilla is what gives you the FTP access to download, transfer, and process large files files.
For a 64 Bit processor use this link
https://filezilla-project.org/download.php?platform=win64
For a 32 Bit processor use this link
https://filezilla-project.org/download.php?platform=win32
and then following the download instructions. - Once FileZilla has been installed on your computer, open up the program and enter in the FTP credentials into the respective field.
It should look something like this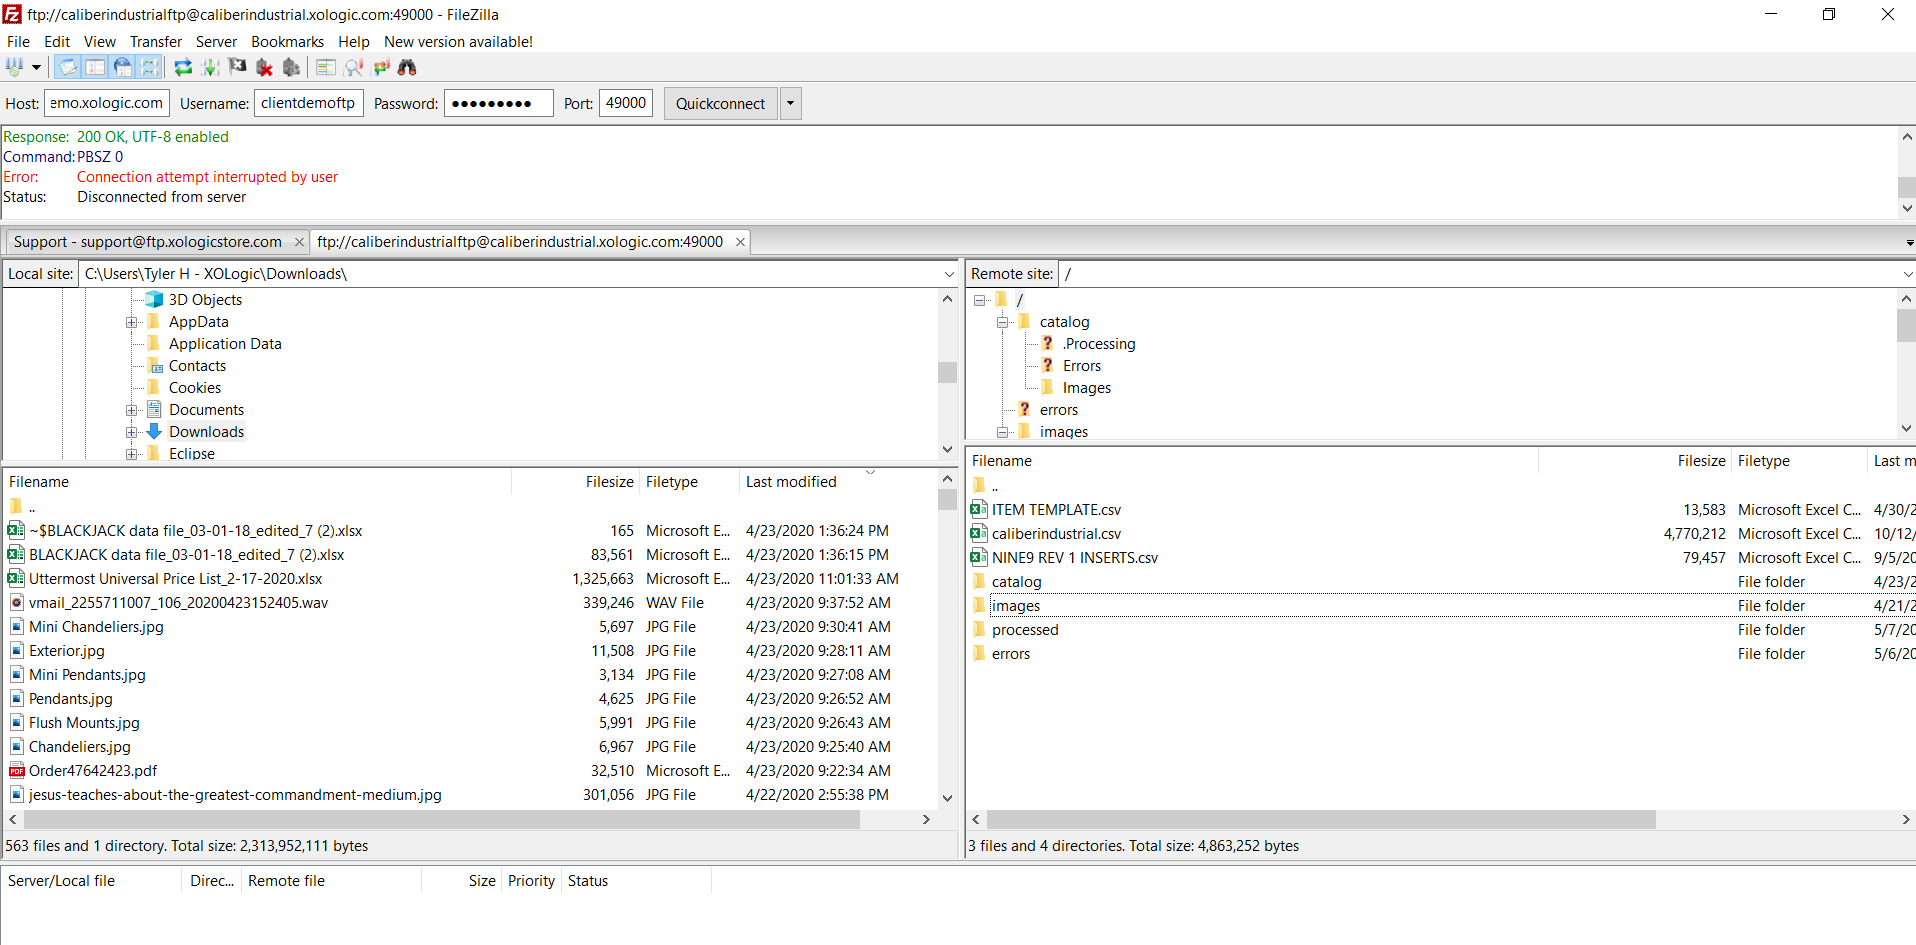
Part Two - Formatting your bulk upload file
Now that you have FTP access and FileZilla is installed you are now ready to format your bulk upload file.
1. Download the attached file named "bulk_upload_instructions" and format your file this way and follow the instructions here.
2. If you wish, you can download the file named "sample_bulk_upload_file" to use this format or create your own working file from the instructions above.
IMPORTANT TIPS
1. Name your Image Name the same as your item number with .jpg at the end, if you have a .jpg image
2. Vendor name. This is how it will appear on your website and it is case sensitive.
3. Category & Product Type. If you want your items to be associated and found in the XO categorization, use the XO category names and Product Type. Our product type for lighting items is Lighting Fixtures. Is you are trying to add something other than Lighting items, contact your account manager for a list of different product types.
4. Save your file as a .csv
Part Three - Uploading your images and files
1. Upload images first before uploading your data file.
2. To upload your images, go back to filezilla and login with your credentials.
3. Create a folder called "images". Inside of that folder, create another folder and name it how you have the Vendor Name in your bulk upload file. Inside of that folder is where you will drop your images
See screenshots below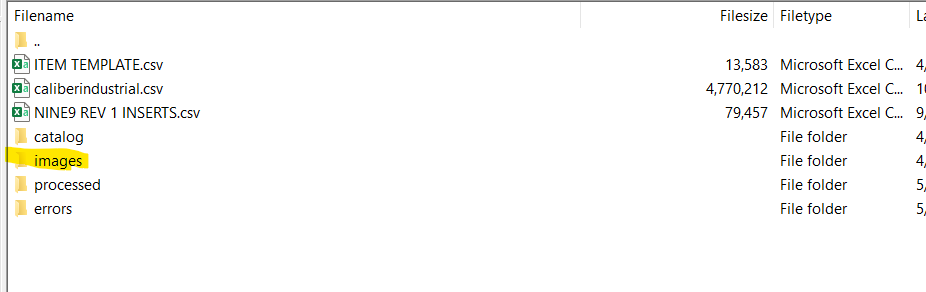
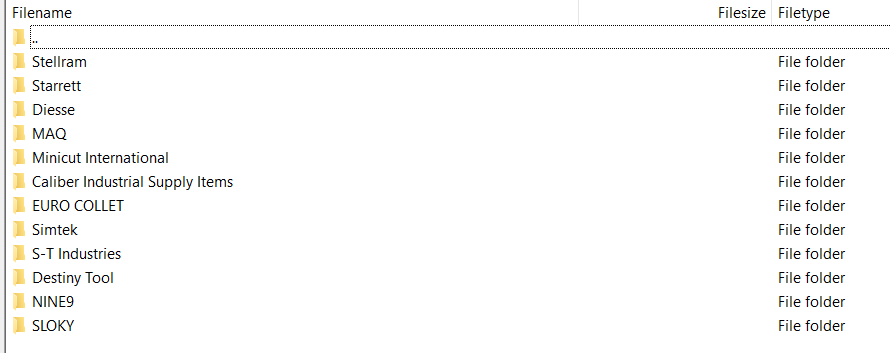
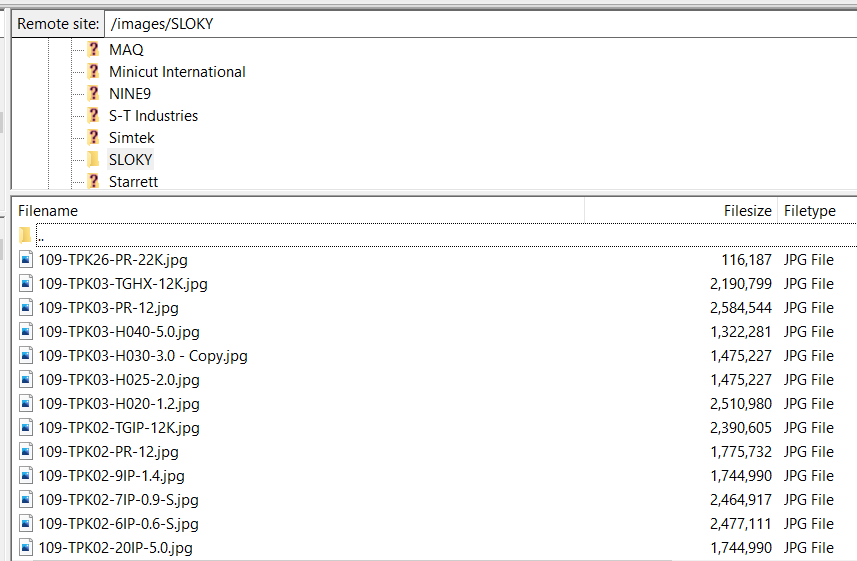
Once images have been uploaded to filezilla, you are now ready to import your bulk upload file.
4. To do this create a folder in the root directory called catalog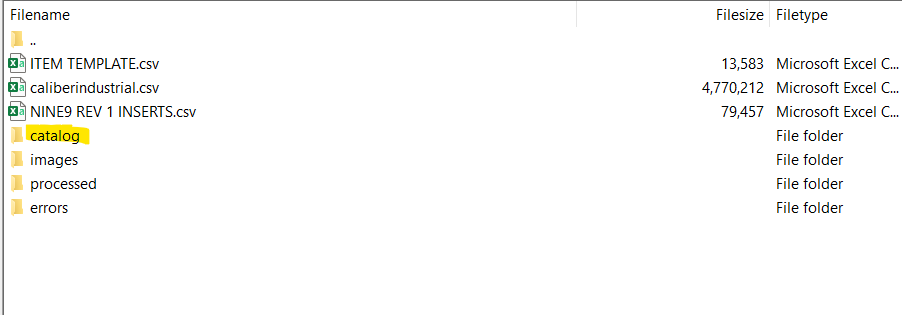
Once inside of that folder, drop your .csv bulk upload file.
Allow at least 20 minutes for the system to process the file. Once our system has processed the file we will remove it from that folder.
If there are any errors, those can be found in the Errors folder inside the catalog folder.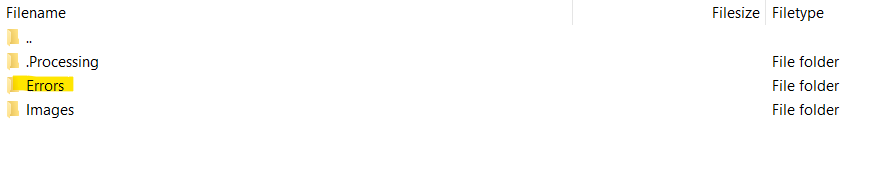
Make the necessary changes to the file and upload it again with just the items that failed.
5. Your external items should appear on your website within 3-4 hours. You can view them by searching for the part number on your website. It will take up to 24 hours for your items to be associated to the categorization that you assigned it.
Comments
0 comments
Please sign in to leave a comment.