
As a business owner, you may want to show the amount of inventory that you have for a particular sku on your website. By showing this information you can help your accounts and customers know what is available right now from that stores location.
The XOLogic platform allows you to update your in store inventory levels as often as needed, and show inventory levels from as many store locations as you wish. Below are the steps that you will take to set this up on your website.
- Go to the attribute section and create a attribute name called In Stock or something similar.
- If you want to show inventory levels from multiple store locations, you need to create multiple attribute names. These attribute names will appear on the item detail page, so I would label them as your store location.
- Import your attribute file. See the attachment named "ax_instock_attribute_sample" for an example of a successful attribute file.
- If you have a small file then you can upload the file through the import button. This will show you the import guidelines for your file.
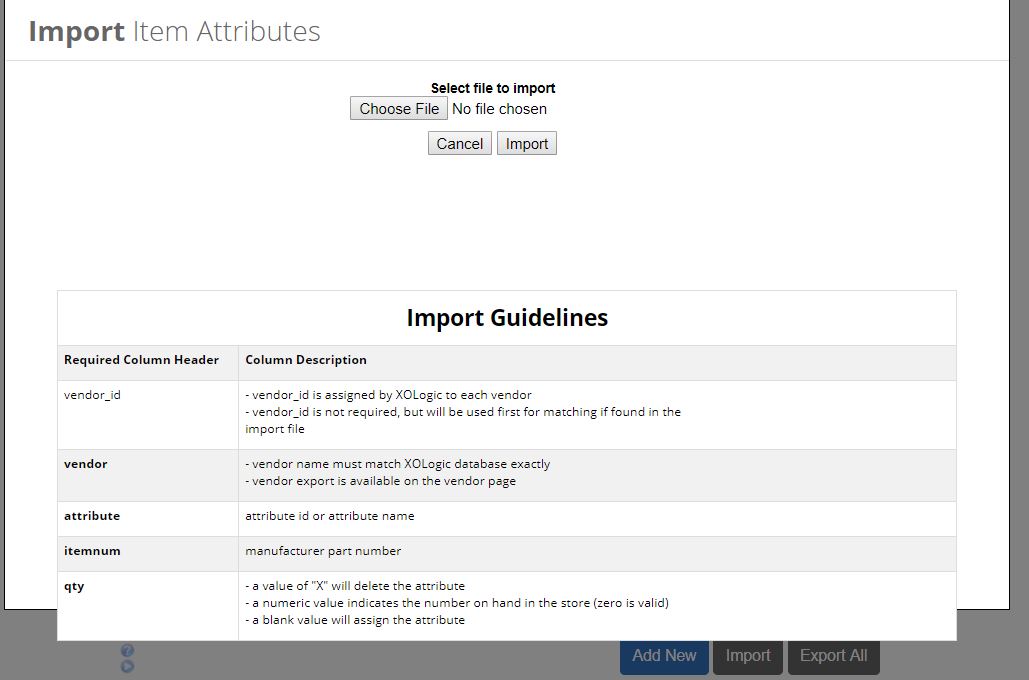
- If you have a large file I would recommend that you import the file through the FTP. Your account manager will have your FTP credentials for you to use.
- To import successfully through the FTP you need to begin your file name with the letters "ax".
- Add the file to the "root directory" and the file will process automatically. You will know that it has processed because the file will disappear from the root directory.
- If there are errors on the file a errors folder will appear and inside that folder you will have your file that will describe the errors and the reason it could not import. Some errors might include invalid vendor name, item number not found, etc.
- If you have a small file then you can upload the file through the import button. This will show you the import guidelines for your file.
- For your in stock quantities to display on the website you need to make sure that you have your availability messages set up correctly. To get to this section go to settings, website, then click on availability messages.
- To show inventory for one location do these steps:
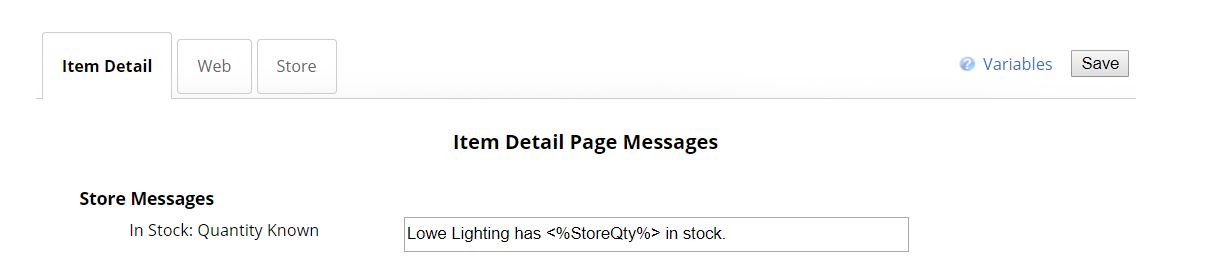
- In the Item Detail tab, then store messages you will need to have this formula in the box, <%StoreQty%>. This allows the system to pull in the quantity from the attribute file. You can create your message in this box to have it say something like the screen shot below.
- To show inventory from multiple locations do these steps:
- In the item detail tab remove the In stock: quantity known and replace it with the word Availability.
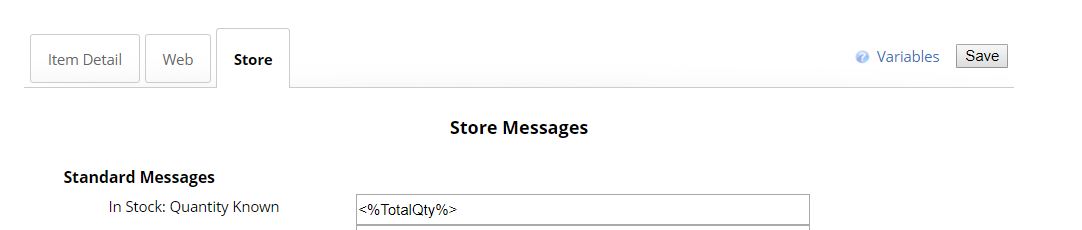
- In the store tab under standard messages, In Stock: Quantity Know add this formula in. <%TotalQty%>
- To show inventory for one location do these steps:
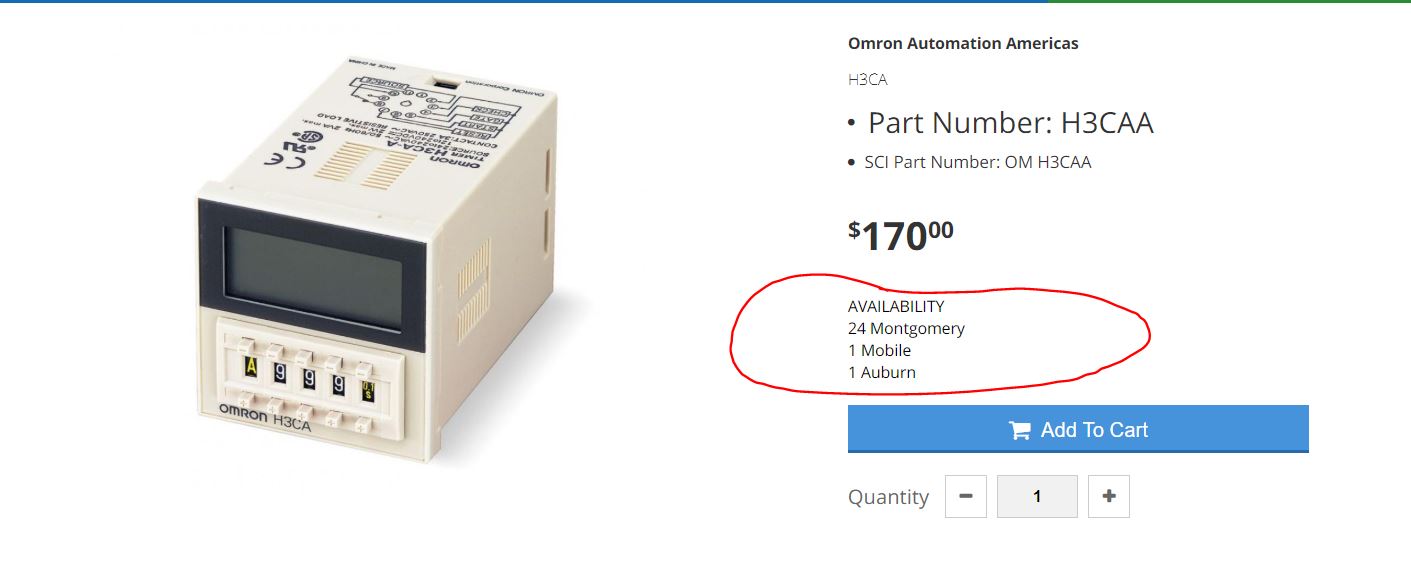
- After you have completed these steps properly the products on your website that have been assigned an attribute should look like this:
Comments
0 comments
Please sign in to leave a comment.