
- Go to Settings > Tools > Tags and Labels
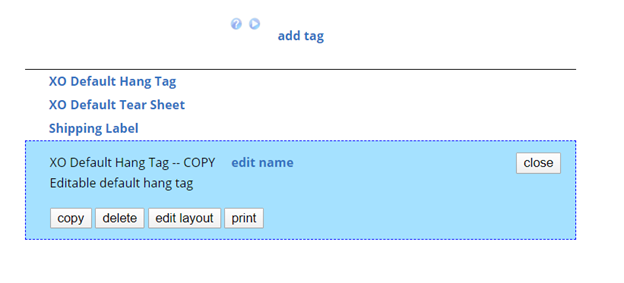
- Once here you will notice that there are two default tags
(XOLogic Default Hang Tag, XOLogic Default Tear Sheet) - With these two templates I recommend to never delete them and always make an additional copy when editing your templates. This allows you to always revert to the original settings if you need to.
- In order to copy, select one of the listed template options: XO Default Hang Tag, XO Default Tear Sheet
and select the ‘Copy’ button - Notice a new template with – COPY at the end of the name
- Select the new template (XO Default Hang Tag -- Copy) and click on ‘edit layout’
- Edit Layout Page (XO Default Hang Tag -- COPY):
On this page we see that Margins and Tags formatting fields that allow you to create a custom tag to the sizes you want to have. This is built to go off of your standard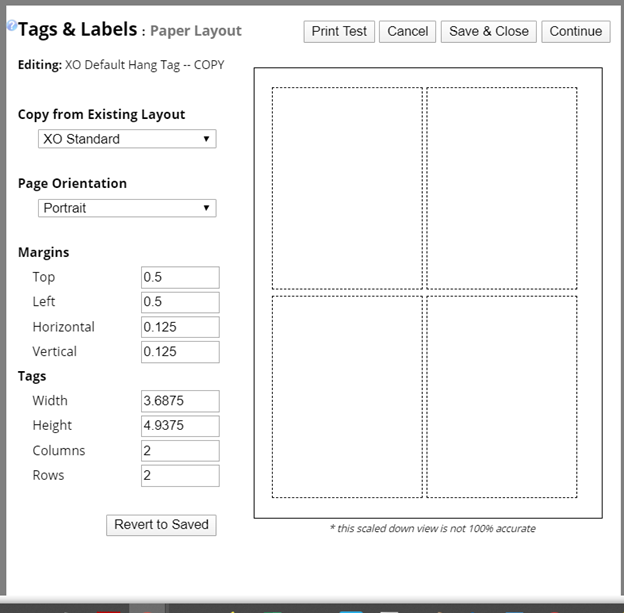
- Notice that there are several Existing Layouts to choose from as well.
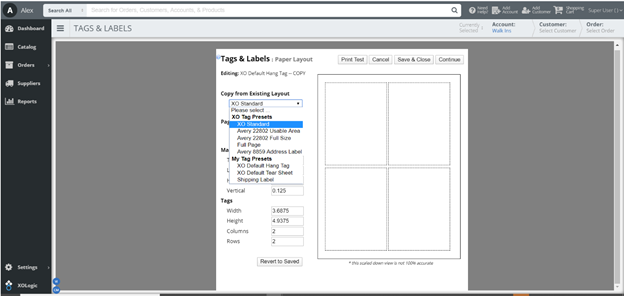
- Once you have your selected layout selected you will then select Continue
- Here we see the various options that we can add to our tags for when we print in the later steps.

- Notice in the above screenshot that the Item Number is currently selected. Once you have any of the options from the left side selected you will see that the options below the template change
- I recommend using the X and Y positioning tools to specify where you want the content to be placed. You can also drag and drop any of the selected content with your mouse however this is not as accurate
- The size of each item can also be changed through the drag option in the visual template or you can specify the exact pixel size by changing the numbers listed.
Comments
0 comments
Please sign in to leave a comment.